Since Apple released iPhone X, many users have been confused as to how they could take screenshots on their iPhone X, which now lacks the Home Button, the one primary button that they used to do daily tasks all these years since the first iPhone.

In this tutorial, we will bring you the step-by-step guide to taking screenshots on your iPhone X as well as older iPhones that had a physical home button later in the tutorial.
How To Take Screenshots on iPhone :
Taking screenshots is now also easy to do, but the instructions will depend on the device you have:
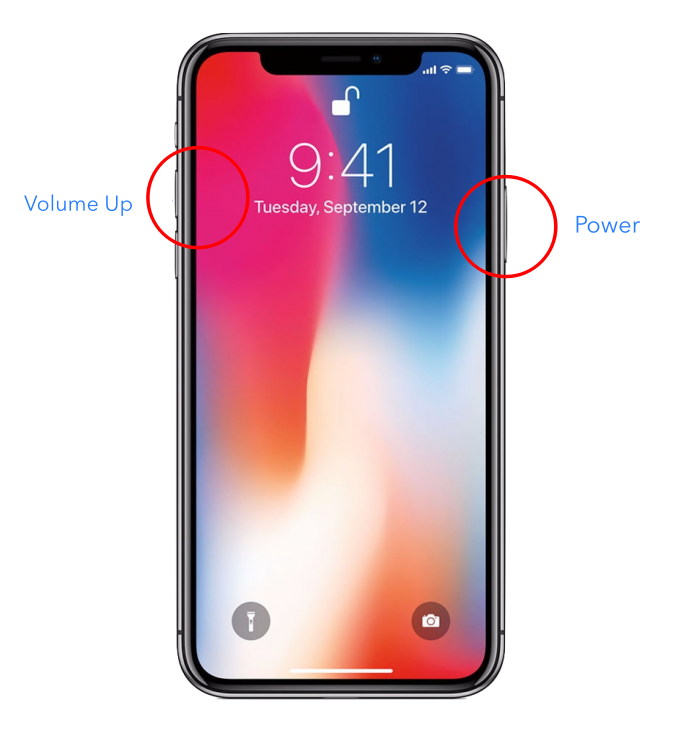
iPhone X:
- Press and hold the Power button on the side of your iPhone X
- Click on the Volume Up button straightaway and then let go of both buttons

- You will see a small thumbnail image in the bottom left corner of your iPhone. Tap it to use Markup (for adding text and drawings), press and hold it to share it or swipe to the left on the thumbnail to dismiss it
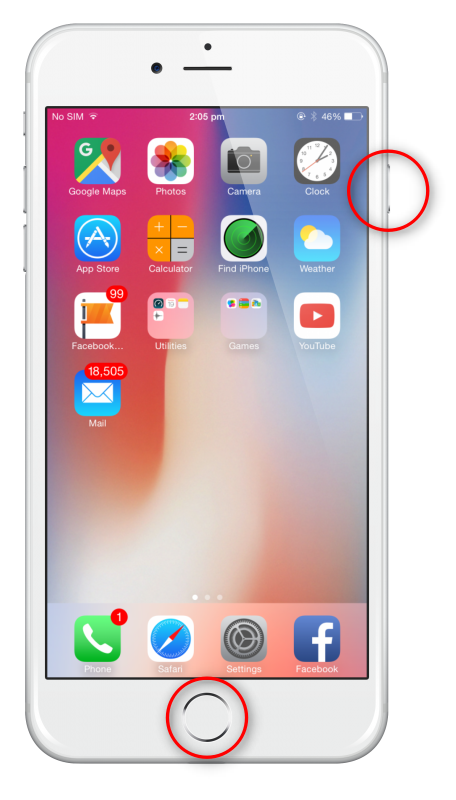
All Other iPhones:
- Press the button on the side or top ( depending on the device ) and hold it
- Tap the Home button and then release the buttons

- A thumbnail will appear in the bottom left of your screen; tap and hold to share, tap to use Markup, or swipe left to dismiss it.
Find your screenshot by opening Photos > Albums > Screenshots.
In our other tutorials, we have explained how you can Record your iPhone and iPad Screen using inbuilt iOS features as well as using your Mac Computer. You can also get greater control over the recording features by using 3rd-party apps that can be installed on your device. Please note that these apps may be free or paid depending on the developers who created them.
If you liked this tutorial, please leave your comments below and let us know how this helped you.